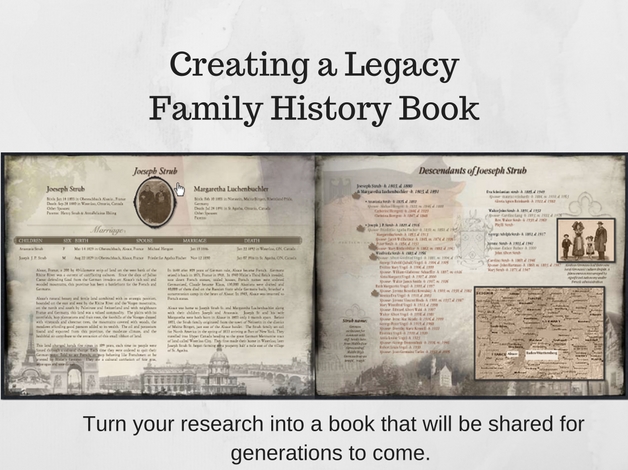
Author: Lynn

How to Create a Content Plan for Your Family History BookHow to Create a Content Plan for Your Family History Book


The most important thing you can do before beginning to build your family history book is to create a content plan. Whenever we take on a project of this size, it’s always best to invest in some time upfront to think through your project.

Why you need a content plan

If you start to write without a content plan, you’re likely to waste a lot of valuable time staring at a blank screen. This is because you’re trying to simultaneously figure out what you want to write, who you want to write about while trying to write. You don’t have a clear idea of structure, organization and contents of your book.

With a plan, you’ll be more likely to start writing immediately. You’ll have a clear outline of each section, chapter, story and profile, the contents and how each will flow into the next.

By creating a content plan, you also engage your brain.  The process of thinking your book out in advance will result in you brainstorming about your book as you work, drive, relax, even sleep. You will continually be searching for ideas and making connections.

Trying to put together a family history book without a plan is an invitation to disaster. Most likely resulting in false starts, wasted efforts and low productivity.

You don’t have to know the content of each paragraph, each sentence, but you should aim for a well-thought-out strategy.

Step 1. Start with a Brain Dump


  • The best place to start creating the content for your family history book is with a brain dump. Dump all your ideas you have about your book into a mind map.
  • Start by identifying the focus of your book? One ancestor, a couple, a family group or one or more surnames?
  • You then want to break down the focus into smaller components, subtopics, maybe even themes.
  • What are the main points you want to cover? With a highlighter, mark each of the big points with a single colour. These might become sections or chapters in your book.
  • What are the subtopics? These will become individual stories or profiles within the chapters or sections of your book. Highlight each of these with another colour.


Step 2 Organize your brain dump

There is no one single right way or tool to organize your family history book. What might be a productive process for one can be very frustrating an inefficient for another?

But there are many planning tools available to help you take your brain dump ideas and organize them. We listed a selection below including both low-tech and high-tech.


  1. Lists & outlines. After identifying the “big picture” of your book, the next step can be to expand your list from the main idea into key supporting points for each chapter in the form of a simple list.


  1. Index cards. Index cards are another time-proven writing tool. I use index cards to organize my stories, but they can be equally beneficial in assembling a book. Each card contains an idea which is then inserted into the right location in the organization of your book. Index cards can organize the topics of a book or the scenes and summary within a family history story. 
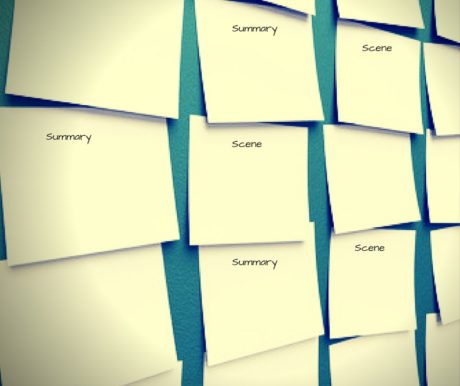
 

  1. Sticky notes. Sticky notes work much like index cards and help you to identify and organize your thoughts quickly. Add just one thought, idea or supporting detail to each sticky note, then attach the notes on a wall or whiteboard or tabletop. Move them around to organize your book. You can use different-coloured sticky notes to colour code your idea.


  1. Create a table. Using a word processing program, like Microsoft Word, you can create a detailed content plan your book. For example, create a 2, 3 or 4 column table in Word, you can list your book into sections, chapters and stories and profiles.


  1. Spreadsheet. Consider using a spreadsheet program, like Microsoft Excel, to plan your book. The process is similar; in the first column, enter the title for each story or profile. In the second column, summarize the main idea associated with each story or profile. In the third column, enter the events and ideas you want to include. Check out the spreadsheet created by one of my students in our recent course, Plotting a Family History Story. This is part of an outline of a family history story. But the same can be done to organize an entire family history book.


  1. Mind maps. I use mind mapping software for all my projects in the very early stages to get down my ideas and help organize them into a logical process as I mentioned above. But mindmaps can also be used to complete your outline. You can make your mind map on a simple piece of paper, a whiteboard or in a digital program like Scapple. I use Scapple for all my brainstorming tasks because first I can use it do braindump but then easily rearrange my brain dump into a logical order for my book. I rearrange as many times as I like never killing a tree.


  1. Digital Storyboard.  Another option is to create a digital storyboard. One of my favourite digital storyboards comes in the Scrivener software. Scrivener uses a digital corkboard with digital index cards to help you outline and organize your story and book. Watch this video to learn how to make a storyboard in Scrivener.

Before diving in feet first to create a family history book, take the time to brainstorm and organize your thoughts into a content plan. Explore the various options to outline your project and choose the one that works best for you.


The sooner you come up with your own efficient way of organizing your ideas before you begin writing, the sooner you can embark on your journey of writing your book!

Brainstorming and organizing a content plan is just two steps in the process of building a


family history book. In our new workbook, Build a Family History Book, A Planning Guide to Getting it Done, we identify an 8-step process for creating a family history book. It includes numerous templates to help you clearly define and organize the content for your family history book and the process to get you across the finish line.


5 Tips for Writing a Family History that Entertains Like a Movie5 Tips for Writing a Family History that Entertains Like a Movie


Most of us start writing our family history as summary. Summary is not a bad thing, and it serves a purpose in our family history stories. However, it is only one part of the equation.

Narrative Nonfiction = Scene + Summary

Eventually, we realize that to engage our family in our story and thus their family history, summary is not enough. We must entertain as well. It’s then that we must develop our knowledge of narrative nonfiction – the writing of true stories.

One aspect of narrative nonfiction that beginning family history writers struggle to understand is the difference between scene and summary.

What is Summary?

Summary, by its very name, encompasses a significant amount of information in a condensed form.

Summary is also known as exposition, and it is condensed narrative covering perhaps many events in just a few sentences, sparse details and may transcend a considerable amount of time. Summary is useful for going over information that we need to know but is not as exciting but still may be necessary to understand the story. Most times, the beginning family history writer overuses summary, often to the point of exclusivity.

What is Scene?

A scene, however, is an event, place or action that the reader experiences first-hand. In a family history story, a scene is an event chosen from your ancestor’s life retold in the fullness of time and place. Scenes are the ultimate tool for showing and not telling. A scene is a single, specific setting that creates the event as an experience for the reader. A family history scene is constructed from the documents of an event. The details are filled in with historical context, social history, eyewitness account and or diaries and letters. (If you’re lucky enough to have them. Most of us will piece together a scene through documents and social history. While you can write a great story that is all scene and no summary the reverse is not true. All summary and no scene makes for a very boring story.

Think of the difference between scene and summary this way. It’s the difference between being told about a car accident (summary) and watching it happen before your own eyes (scene). You may be able to imagine how horrible it was if someone tells you about it, but when you see it happening first-hand, you never forget it.

The best way to write a scene that will engage and entertain your readers is to think of your writing cinematically.  Like movie playing in your mind’s eye. Of course, just thinking in your mind’s eye is one thing, getting it down on paper is a whole other matter.

Here are five tips for writing a scene that will entertain your readers like a movie.

5 Tips for Writing a Scene Like a Movie

1. Slow down. Don’t cram ten years into one paragraph, pick a single moment, a single event in your story and show it happening.

2. Make sure the event you choose is important, pivotal and will reveal relevant information about your ancestor or the story.

3. Show your ancestor in action either through physical movement or with dialogue or both.

4. Set your ancestor in their surroundings using all the senses. There should sights, sounds, smells even taste and touch if relevant.

5. Give the reader insight into your ancestor’s personality and state of mind through their actions, the look on their face, their voice and the words they speak.

When we take the time to learn to write a scene as part of narrative nonfiction, to show the crash rather than tell about it, we transform our family history stories into an experience for the writer and not a summary of facts.

Learn how to take an event in your ancestor’s life and bring it to the page in the Masterclass. 

Top 10 Ingredients to Building an Heirloom Family History BookTop 10 Ingredients to Building an Heirloom Family History Book


One.

Stories – Your stories can come in a variety of forms. They may be a collection narrative nonfiction short stories about a variety of ancestors. You may choose to write a longer form story taking the reader through an epic adventure based on one ancestor, a couple or a surname line.

Two.

Profiles – You can include ancestor profiles in your book to give your reader a snapshot look into an ancestor. Use profiles when you have too many gaps in your research to tell their whole story. If the ancestor has a great story, they are an interesting person, but they are not directly part of your main narrative consider writing a profile in the sidebar or give them a single on off page. This page is dedicated to a great-uncle who died at Passchendaele in WWI. He wasn’t directly part of the story, but we felt the need to honour him.

Three.

Pedigree Charts – Pedigree charts can serve the readers as a beautiful big picture view of their family history. If you are covering several surname lines in a book, consider including one for each.

Four.

Group Sheets –Each time you start a new family, a group sheet a is a great way to give the reader a big picture view. You can also include some smaller details and facts on the group sheets. By making sure all these details are on the group sheet, you won’t feel required to cram it all into the story. The story can then be a story and not a collections of facts woven together.

Five.

Descendants Chart – The descendant’s chart can help you to include the children of a couple, along with their spouses and children. This conveys a lot of information that may not be part of the direct line you are writing about but still expresses your research and can be an excellent resource for the family.

Six.

Pictures – Choose pictures that enhance your story and show your ancestors in various stages of their life. Unfortunately, not everyone will take the time to read the stories. Sigh.

Seven.

Picture Collage – Consider creating a picture collage, it can demonstrate a life without words.

Eight.

Documents – Choose poignant documents that reveal essential turning points in your ancestor’s life. Passenger lists, land document, will. Don’t feel obligated to include every census and vital record you have uncovered only the ones that were critical to the direction of your family history. If you wish to share the rest of your research and documents, save them to a cd and insert in the back of your book.


Nine.

Sources – Don’t forget to include your sources. While footnotes may not be ideal for an Heirloom Family History Book, you can still add a list of sources at the end of your book referencing the page numbers and quote the line of the fact. You can also add your list of sources to the cd if you want to keep a clean look to your heirloom book.

Ten.

Current Family – Don’t forget to include your present family in your book. If they are in it and they can see their connection to the past they are more likely to take up interest and buy your book.


Productivity Podcast – PerseveranceProductivity Podcast – Perseverance


Just like genealogy, writing is a long-term endeavour. Your family history stories won’t be completed in an evening, and therefore perseverance is something we all strive for from time to time.

In the Family History Writing Studio, we have an organized writing group called Lynn’s Inner Circle. The Inner Circle consists of students who have completed our Writing a Family History Scene Course and Plotting a Family History Story. Our Inner Circle members write on a regular basis with the support of our membership group.
As a member of this group, you have the option of posting once or twice a month. Your submissions are critiqued and given feedback by myself and the group.
I can say everyone is learning from each other, the regular monthly routines are helping members to support their writing schedules and getting closer to completing their stories.
Another benefit of being a member of this group is my private podcast. I offer them on the 1st and 15th of the month. We call them our Productivity Podcasts and they focus on topics that help our members become more productive writers.
Today, we switch things up and offer something different as we share with you our most recent podcasts on Perseverance.

I hope you enjoy today’s podcast and you will strive to become a member of the Inner Circle where we will help you take your writing to the next level.


5 Habits that Will Help You Build Your Family History Book.5 Habits that Will Help You Build Your Family History Book.


We’ve fleshed out the idea for our family history book. We’ve outlined the process with our milestone goals. We’ve identified the tasks we need to carry out our milestone goals in our project planner. Now it’s time to create a daily schedule and incorporate daily habits that are going to support your tasks in getting your book accomplished. It’s time to make this project fit into your daily and weekly schedule. Let’s move it from being a dream to a reality.

We can’t create more hours in the day- we are all stuck with the usual 24 hours- but we can get more out of each hour by making our time count. I’ve listed below 5 practices that you can put in place to help you move your family history book project out of the planner and into your daily calendar.

First, we need a calendar to complete this part. Decide whether you want to use Microsoft Outlook, or Google Calendars or a good old-fashioned analog calendar. I like the Ink & Volt Planner to merge by projects into my daily life. By the way, my newest love is this lovely erasable gel pen to use in my planner.

Once you choose your calendar of choice let’s start pulling your tasks from your Family History Book Project Planner into your daily calendar.

1.Plan Ahead

The first task we make a habit is to plan ahead. Sit down each night and plan out the activities for the next day. You’ll be amazed by how much more you can get done if you always know what you should be doing. Where you’re going next. Create a list of all tasks you wish to get done the next day. Include everything, not just your book-related tasks but taking the dog to the vet, grocery shopping etc. It will help you to balance the time you have for your book project and the time you have for life.

2. Prioritizing the Big 3.

This is key to your daily schedule. Otherwise, you might find yourself wasting away the day on a task that does not advance your book project. Each day name your big 3 priorities, the top three items that must be accomplished to advance your family history book. These tasks should be taken from your project planner that you created.  When you first try planning your day, you may find it hard to decide which are the most important and should move to the top of the list. Sometimes it can feel like everything is crucial. But with practice, it will become easier. It is really about asking yourself, which items on the list will have the most significant positive impact if I get them finished tomorrow. Move them to the top of the list.


3. Schedule your tasks on your calendar.

Also, show how time much is required for this job. Write down exactly what times you intend to spend working on your three highest-priority tasks. Making an appointment with yourself and your project task is essential. You’re saying these are important to me. They don’t have to be completed in order of importance only that tomorrow you will finish them. They are a priority and are deserving to be on your calendar. Your schedule doesn’t have to be set in stone – in fact, you will almost certainly end up shifting things around as new tasks come up and old ones lose their urgency. This is why I love my erasable gel pen. Deferring things to the next day because sh*t happens is ok. But don’t make this a habit.

4. End of Day Review

At the end of each day, review your accomplishments. What got deferred, were there any new tasks that were added to the list. Begin planning for tomorrow, identifying your big 3 once again, and scheduling. Make this a daily habit, and you’ll soon find yourself checking off those tasks on your project planner one by one.

5. Weekly Review

At the end of each week, I like Sunday to take a few minutes to review my week. Review your project planner. Identify your big priorities for the upcoming week. Review what you accomplished on your project in the previous week.  This habit is not so much for identifying your gaps but for no other reason than to give you confidence and to keep you motivated. Be proud of everything you’ve accomplished. Review your milestone goals and the tasks, are there any you can mark as completed? Move the next tasks in project planner to your weekly calendar.


If you continue to repeat these 5 steps each week and make them a habit, you’ll very quickly find yourself closer to the finish line of completing your dream project of building your family history book.

With a little organization, scheduling and daily habits, you can make your family history book a reality.


Part 1: Identifying Your Dream

Part 2: Fleshing out the 8 Milestone Goals

Part 3: Making an Action Plan and Project Timeline


How Scrivener Can Help You Complete ‘The Challenge’How Scrivener Can Help You Complete ‘The Challenge’


If you haven’t heard of Scrivener before or maybe you have, but you’re not sure how it works or what all the fuss is about, then I would like to take this opportunity to give you a brief explanation. Scrivener is a writing management software program that has amazing capabilities. It’s a fantastic app for writing long text such as family history stories but offers you many features that make it much more effective and efficient then let’s say Word.

Scrivener is built on four core ideas.

  1. Write your story in sections as small or as large as you like and easily rearrange them.
  2. Add synopses to sections, so that it is easy to work with an overview of your manuscript.
  3. View research and other parts of your writing side-by-side with your writing.
  4. Export your work using different formatting for different requirements.


Of course, this is stating the program very simply. While I’m confident, you can see how this program can benefit you in writing your family history stories. Let’s take it one step further and get a little more specific with a few tips on how it can help you in our upcoming Challenge.

Set Your Targets.

You can set a goal of how many words you want to write each day. Scrivener will keep track of your targets for you. Knowing you’ve met your target for today will make it that much easier to write tomorrow. You’ll find Targets under ‘Project’ the menu.

Incorporating Your Storyboard into Scrivener.

In our Challenge Prep Course, you learned how to create a storyboard, a story plan so that you know exactly what you are going to write each day during these four weeks. Create your storyboard in the Research section of your Draft. This will allow you to reference the storyboard as you go but will also enable you to have the freedom of keeping the storyboard as a separate entity from your draft.

Jump Between Sections.

It’s so easy in Scrivener to jump around and write different chapters or scenes as you see fit. You don’t have to write in chronological order. If you followed our Challenge Prep Course and created a storyboard then you can pull anyone of your scene cards and write.

Create Some Target Points.

If you don’t have a storyboard ready you can still create an outline to help guide you.
In the Draft folder in Outliner mode, create some blank documents with titles and short synopses for each of the critical scenes you identified for your storyline. This will help to tell you where you are going. Not as detailed as a storyboard but it can still be very helpful in keeping you focused. However, you can work towards filling in the spaces in between. They’ll sit in the binder and make sure you know where you’re going. If your story changes direction, you can change them or delete them as needed. Having a destination can help you to keep moving forward even if you decide to change course later.

Import Your Inspiration.

In Scrivener, you can split the editor, so that half of your screen is your story and the other half allows you to view your research. This can also be a great help when you are in need of inspiration. For example, when it comes to describing the setting of your story, take some time to search the Internet for some setting pictures of the location of your story. Upload them to your research files and then when it’s time to write that setting you’ll have inspiration at your fingertips.

Make a Research List in Document Notes.

This is probably one of my favourite tips. When you are writing the last thing you want to do is stop writing and get pulled on the Internet doing research. Keep your writing and research times separately. I like to use Project Notes to keep me on track. In the Inspector, under Project Notes, I create a new note that I’ll title Research List. As I’m writing and I come across something that I need a little more information on, rather than leaving my writing, I will make a small note in my manuscript where I want the information and then add the item to my Research List. When I’m not writing and I have some time, I can pull up my research list do some research.

Scrivener Special

This year during the Family History Writing Challenge, I am going to offer some small tips in our Daily Dose emails on using Scrivener and helping you to improve your use and knowledge of Scrivener. If you’ve been sitting on the fence about using Scrivener then this is the year you may want to give it a try.

 A Discount From Scrivener

Scrivener has been kind enough to create a coupon code that will give you a 20% discount on the purchase of a standard licence for either Scrivener for macOS or Scrivener for Windows. For your discount use coupon code: FAMILYHISTORY
If you don’t yet own Scrivener, you can download the 30-day free trial. Click Here.

 A Discount From Us

In addition to your Scrivener discount, we are offering a 30% discount off our eBook Scrivener for The Family Historian. It regularly sells for $9.99 we are offering it for $6.99. This price is in effect for the next 72 hours.

Extended to Monday Jan 22, 2018.

Use coupon code: challenge2018
If you’re still not sure about Scrivener, check out our Scrivener Video Page where you’ll find videos that will give you a look inside Scrivener.

10 Tips to Score Big with the Family History Writing Challenge10 Tips to Score Big with the Family History Writing Challenge


  1. Create a daily target goal. It’s important to understand how much time you can dedicate to writing each day and how many words you can write in that timeframe. Do those targets coincide with your goal? You have to do the math and set realistic and expectations for yourself.


  1. Choose an Ancestor to write about. You can’t possibly write your entire family history in 28 days. However, you can choose one ancestor and one story that you can write about during these 28 days. Don’t overwhelm yourself. Start with one story, one ancestor.


  1. Take some time to get organized. Gather your research together and create a workflow. It’s important to get organized before you begin to write so that you actually spend your time writing and not looking for your research. You’ll be a much more productive writer and find the process that much more enjoyable.


  1. Complete an ancestor profile. Dig deep and learn as much as you can about your ancestor. The more you know, the more confident you will be about writing their story. A profile is a vital tool to fleshing out your ancestor and getting to know him or her in-depth. You’ll find an excellent ancestor profile in our workbook, The Authentic Ancestor.


  1. Create a timeline of your ancestor’s life. Timelines are fabulous tools to help you understand what you know, what you don’t and to help you find your story. Don’t miss this step.


  1. Identify your ancestor’s story? We don’t just want to tell a chronological tale of an ancestor’s life from beginning to end, that would be boring. Instead take the time to find your ancestor’s goals, motivations and the risks they took to meet their dreams.


  1. Understand scene and summary. Family history stories are written using the genre of narrative nonfiction. Narrative nonfiction uses scene and summary like building blocks to create a story. Make sure you understand this concept as it is at the core of writing your family history stories. It will also help you in creating your storyboard for your writing. Our workbook, Crafting a Scene is an excellent resource for learning scene and summary.


  1. Create a storyline. A storyline is like a timeline but different. It is the timeline for your story. Identify the key scenes that will carry the story and organize them into a storyline. A storyline will help you to create an entertaining and suspenseful tale that will pull your readers along. You can learn to create a storyline in our workbook, Finding the Story.


  1. Create a 4-week storyboard. A storyboard is your map for writing. Using index cards, you can outline your storyboard using scenes. Once you create your storyboard, it will serve as a great visual reminder of your writing plan, day by day. A storyboard will keep you focused and on track. Want to learn more about storyboards consult Crafting a Scene.


  1. Create a daily schedule and your writing place. Make sure you plan your writing and make it a priority, at least, for the next 28 days. Also, you need to identify a place for writing, a desk or table, you can claim as your writing space. These are essential steps to completing the Challenge with success and making it a priority for the next 28 days.


If you want to meet with success this year, you need to make writing your family history stories a priority, and you need to come with a plan. We cover all 10 of these steps in detail with worksheets in our Family History Writing Challenge Prep Course.

This year, score big in the Family History Writing Challenge. Be ready to write.

Creating a Family History Book: An Action Plan with TemplateCreating a Family History Book: An Action Plan with Template


Now that you completed the Milestone Goal Planner that we provided for in Part 2 our series on Planning a Family History Book in 2018. You should feel much more comfortable about having a solid direction and plan for your family history book. You certainly have a lot of work ahead of you, but now with your Milestone Goals identified your vision for your book is clearer.

Now, we move on to step 3 – The Family History Book Project Planner.

Sometimes a project can go rather smoothly, and sometimes it can be a complete nightmare that wakes you up at 2 am every night.  A Family History Book Project Planner is the best defense against chaos and sleepless nights.  The project planner is a timeline planning tool that will help you to organize all your milestone steps and actionable tasks in a consistent and readable manner. This tool will help to make jobs, milestones and dates crystal clear. The more straightforward and more uncomplicated it is to read – the better. Don’t worry I have a simple template all ready for you. You just have to plug-in your tasks and dates.

Now, most of the information like milestones and tasks we completed in Part 2. So we just need to plug them into our spreadsheet. However, on our Family History Book Project Planner, we are going to add a few more items.


Add resources to each task. Some of your jobs may require specific resources to We want to add these resources to our planner.


Show duration of tasks. Each task should have a start and an end date. You can fall off schedule quite quickly if we don’t give ourselves hard stops along the way for our tasks. It’s not enough just to have dates for the Milestone Goals, but our tasks need clear timelines as well.


Add notes to your tasks.  Add notes to the responsibilities that might seem confusing or need explanation. It never hurts to add detail. The more specific the timeline, the easier it will be in referring to and keeping you and your project on target.


Ask someone to review your Project Planner. You know the saying ‘can’t see the forest for the trees.’ Well, it never hurts to have a second set of eyes look at your Project Timeline to make sure it all makes sense. Before you finalize your timeline, have someone you trust be your second set of eyes. Have them check it to make sure it all makes sense. Even without knowing your project, the Project Planner should be clear for them to read and follow along.

We set up the Family History Book Project Planner in tow easy to use Excel and PDF formats.  Download below.


Family History Book Project Planner (Excel)

Family History Book Project Planner (PDF) 


Your family history book project can change, and all good plans should be flexible. But don’t let all your preparation be hijacked by family members demanding certain things be put in or left out of your family history book. The first version of your plan is your baseline, and it outlines every step you need to take to get from the beginning to the end of your project. Sure, strategies can change. New scopes can quickly creep in. But remember changes can cost you time and money. Let your planner help you to argue the case for or against these changes. Let your Family History Book Project Timeline be your project’s roadmap.

Now that your plan is complete and in place, it’s time to start doing. Don’t let the planning stage take over your life. The point of the plan is to get you to the starting line so that you can run the race and cross the finish line. Don’t just train for the race, run it. Too many family historians, talk and plan their family history book but never bring the project to the finish line. Let our Family History Project Planner be the tool to help you bring your family history book across that finish line.


Coming up Next: How to incorporate daily habits into your life that will support your family history book project.


Creating Your Family History Book: Fleshing out 8 Milestone GoalsCreating Your Family History Book: Fleshing out 8 Milestone Goals


In part one of our series Creating a Family History Book, we looked at identifying our dream of creating a family history book in 2018 along with recognizing our motivations behind the dream. I hope you took the time to identify your vision in specifics and to write it down using our template.

Now it’s time to move forward and to flesh out the eight milestone goals that will help you move closer to accomplishing that dream.

In my work of writing a family history book, I realized there are eight key goals that I had to meet along the way. I also realized it was essential to think and plan out each of those goals in advance before I began to write.

Let’s identify these 8 milestone goals. They will be your guide to creating a family history book. You won’t necessarily complete these goals in this order, but for the sake of planning your project, I recommend working through them in this order.


  1. Distribution of the Book – The first thing is to start at the end. How do you plan on selling and distributing the book? Who are you selling or giving the book to? What is your deadline for distribution? Do you wish to release the book at a specific event or in time for a milestone birthday or anniversary? Even if you don’t have an event to use as a deadline, it is best not to leave the publishing date open-ended. Always have a deadline to keep you on task.


  1. Printing the Book – Acquire quotes for printing of the book. You can have your book published online with any number of book publishers. My favourite is Createspace. You can check out my final product here. You can also take it to your local printer, or even your local office supply store can print it for you. But do your homework. Decide on a number of pages? Each page will cost more money. Will your book be colour or black and white? How will it be bound? Who will design the cover? How many copies do you need? How much time does the printer need? In what format does the printer require the manuscript? Set a deadline to get the manuscript to the printer, so it is back to you in time for your distribution deadline.


  1. Final Editing – Who will edit your book for you? It’s essential to have an outside editor. While you can rely on family and friends, you must be appreciative of their time and not expect a quick turn around. How much time will they need? Consider that several edits might be required. Set a deadline for each edit.


  1. Formatting – Scan pictures, documents, etc. for inclusion in the book. Choose font, spacing, cover design. Who will format the book? This could be the printer, yourself or someone familiar will book formatting like an editor. You may format your book in an online program such as Createspace or even in the writing software Scrivener. Once again, set a deadline for completion.


  1. Identify the Ancestors and their Stories – Identify the ancestors that you will write about. Create a list and gather and organize the research you require for each. Complete an ancestor profile which will help you to identify any missing gaps in your research and help you to get to know your ancestor better, before writing about them.  Do you have enough research to tell a proper story? Organize all your research for this project into one place so that it is easily accessible. Some options include a computer file, Evernote, OneNote or Dropbox. Getting Ready to write. It important to establish a good workflow before beginning.


  1. Outline the Stories – Outline each of the stories for the ancestors you have identified. If your book is one story, then create a storyline and storyboard so that you have a plan for your writing. If you are writing several stories than you will want to create a storyline and storyboard for each story you plan to write.


  1. Schedule the Writing – Plan when, where and how you will write and complete the stories for your book. How much time will each story take? Identify how many words you can write in a given timeframe. How many words and can you write in an hour. How many hours to write first the first draft. How much time is required for revisions? Find the time to write and schedule it on your calendar. Create a deadline for a first draft and for completing revisions in time for the editor.


  1. Finalize the end Product – Now that you have worked through milestone goals 1 to 7 your vision for your book may have changed or altered a bit or drastically. That’s ok.  Identify and rewrite your new vision for your product if it has changed.     

What is A SMART Goal?

For each of these milestone goals, we want to make sure they are A SMART Goal. All goals should have the same common elements. They should be specific, measurable, actionable, realistic and have a target and we are going to add one more element, accountable making them A SMART Goal.


Let’s define each of these elements.

A- Accountable.

Who is going to keep you on task? Find an accountability buddy, or join a writing group. Somebody or some who will keep you focused on a regular basis for each of these milestone goals. They can be different people for each of these goals.

S – Specific.

Be as detailed as possible about what this goal is and what it will include. Write out the goal in specifics.

M- Measurable.

How will you measure your progress? Create a way of checking off or measuring your progress.

A-Actionable.

Each of these goals should be easily broken down into actionable tasks.

R-Realistic

Don’t take on more than you can chew. If you have never written a story before don’t start out by thinking you’re going to write an epic novel. Start out with short stories or ancestor profiles. Be realistic about your time and skills. If you’ve never written a story before taking a writing class might be a task you need to add to your project timeline.

T-Target.

Every goal should have a deadline, not just one overall deadline. These dates will keep you motivated and on task along the way.


Download our Milestone Goal Planner sheet to help you flesh out each of these milestone goals.

Milestone Goal Planner


In Part 3, we will organize our Milestone Goals into an action plan to keep you focused and on task.


Creating a Family History Book in 2018

Part 1: Identifying Your Dream

Part 2: Fleshing out the 8 Milestone Goals

Part 3: Creating an Action Plan

Part 4: Establishing Daily Habits


4 Steps to Creating a Family History Book in 20184 Steps to Creating a Family History Book in 2018


Do you dream of creating a family history book?

Has your book been just that, a dream?

I’m a big believer that to accomplish your dreams you need goals and a plan.

For those of you who are dreaming about creating a family history book in 2018, our next four posts are designed with you in mind. We are going to close out 2017 and begin 2018 with developing a plan to turn your family history book dream into a reality.

Over December and January, we will cover the following in a 4-part series.

Step One.  Identify your dream and the purpose behind the dream

Step Two.  Identify and set your goals needed to make your family history book a reality

Step Three.  Make an action plan and timeline for accomplishing these goals.

Step Four. Set up the daily habits required to accomplish your goals.

Each part will come with a downloadable template to help you flesh out your plan on paper.

Today, we start with Part 1 – The Dream, and its Purpose.

Part 1 – The Dream and What Drives Your Dream

Your dream is to write a family history book. But why do you want to write a family history book? It’s not enough to just have the idea. You must also identify the purpose and passion behind your vision, any vision including creating a family history book.

When you have a clear sense of the purpose of your project it enables you to focus your efforts. It compels you to stay on task and push forward when the work might become difficult or overwhelming.

Knowing why you want to create a family history book is an essential first step in figuring out how to achieve this dream.

Only when you know the why will you find the courage to take risks needed to make it happened, to stay motivated when the road becomes tough and to take on a challenging yet very rewarding trajectory.


Why I write family history stories and books?

To help you identify your own purpose behind wanting to create a family history book I thought I would share some of the reasons that got me started in writing family history but also why I continue to make it a significant part of my life.

  1. I believe that stories can close the gap between our ancestors and our families. We’ve all tried to share our family history with our loved ones. We’ve all been met with the eye rolls. I believe that in creating a family history book that is entertaining and compelling, I could overcome their resistance and close this gap.


  1. I was worried about spending years researching my family history, acquiring boxes and files full of information only to have it lost or be packed away when I left this world. I wanted to create a book that was going to be a representation of my work. It would not be just a legacy of my ancestors but my legacy of years of research and dedication to my passion for genealogy.


  1. I wanted to create something that had longevity, a book that was going to sit proudly on all my relative’s bookshelves. It wanted a book that they would be proud to have displayed on their coffee table. I wanted a book that they would reference from time to time over the years and a book that would be passed on for generations to come.

These were the three significant purposes that fed my dream to create a family history book. You may have other reasons for wanting to create a book. The point here is to acknowledge those motives. These larger purposes will feed you throughout your writing journey. When you have a drive and desire for your project, you’re more likely to stick with it.


The Power of Writing Down Your Dreams and Goals

An essential component in making your dreams a reality is to write them down.  There is considerable evidence to support the fact if you write down your thoughts and goals you are more likely to transform those desires into reality. It also suggests that if you share your written goals with a friend who believes in your ability to succeed it will aid you in meeting with success.

Therefore, each step along the way in this 4-part series, I will provide you with a template you can download and print off and fill in so that you have your dream, purposes, goals and action steps all written down. Not only will this help you take your ideas from the thinking stage to putting them on paper and making them concrete you’ll also have a written plan to help you proceed.

Let’s start by identifying your dream to create a family history book and the purpose behind your vision. Download the Dream and Purpose Template and fill it in.

Your Dream and Purpose Template

Watch for our next installment as we take your dream and begin to identify the goals needed to make it a reality.


  Identifying Your Goals

 Making an Action Plan and Project Timeline

Jan 17, 2018 –  Creating Daily Habits that Support Your Goal